How to Scan Old Photos

The Importance of Scanning Your Photos

One of the most important requirements in achieving a good photo restoration is a proper scan of your photographs. With a little attention to detail and the right settings, you will not only preserve your photos from further deteriation, you’ll be able to create a base file suitable for digital restoration. In this tutorial I’ll walk you through the process of using a flatbed scanner to create a base file appropriate for retouching work.

9 Tips For a Better Scan

  • Ensure the scanner glass is clean before starting
  • Handle photographs by the edges only 
  • Clean dust from surface of photos before scanning
  • Ensure the photo is flat against the glass
  • Use the the preview scan to set the scan area
  • Avoid sharpening and other major adjustments
  • Scan at 300 dpi for 1:1 reproductions
  • Scan in full colour, even if original is black and white
  • Output to Tiff format

Scanning Procedure

1. Make sure your scanner is clean from dust and fingerprints 
Before scanning any prints, examine the glass surface of your scanner. It’s not unusual to see dust particles and sometimes marks from fingers or knuckles on the glass. All of these particles and smudges should be removed before scanning. Depending on the contaminant, you can use a microfibre cloth or a damp cloth with a glass cleaner. Apply a gentle amount of pressure while wiping and allow the scanner glass to dry completely before laying photographs. You may need a few passes if grease from fingerprints are involved. 

2. Handle photos by their edges
As the title says, do not squeeze a photo between your fingers. This causes creasing and surface wear on older photos. On photo-chemical prints, fingerprints are virtually impossible to remove completely.

3. Make sure your photograph is clean from dust 
A lot of dust issues that require retouching work are caused by transfer during scanning. Even if a photograph has been stored in a sleeve, it can transfer dust onto the scanner bed, contaminating future scans. Ue a soft brush, blower, or microfibre cloth to gently wipe the surface of the photo. Do not use any cleaning agents, and always handle photos by their edges.

4. Ensure the photo surface is flat against the glass
Anything that raises the photo surface away from the glass will result in a slightly out-of-focus image. Therefore picture mats and frames must be separated from the print itself. If your photo is curled, you can place a thin book or similar object on top of the print to hold it flat while closing the scanner lid.

5. Preview the image area
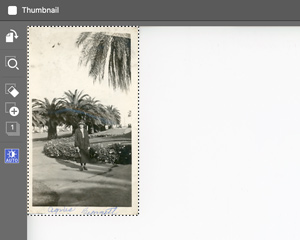
Scanner software will include a Preview button. Use the preview scan to set the guidelines for the image area. Sometimes the software will accurately find your photo, but be prepared to manually adjust the scan area using the dotted guidelines. Simply drag them in or out as needed to set the crop.
If your photo has borders, you can choose to crop them now or later. Whatever you decide to do, however, avoid cropping out any picture information. Your photo does not need to be perfectly straight at this point. The retoucher will straighten the photo and crop our any extra edges before starting the restoration.
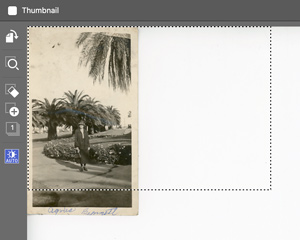
Scanner guides appear after preview.
Scanner guides manually positioned near the photo. Notice how the auto exposure changed – not necessarily for the better.

6. Enter Settings
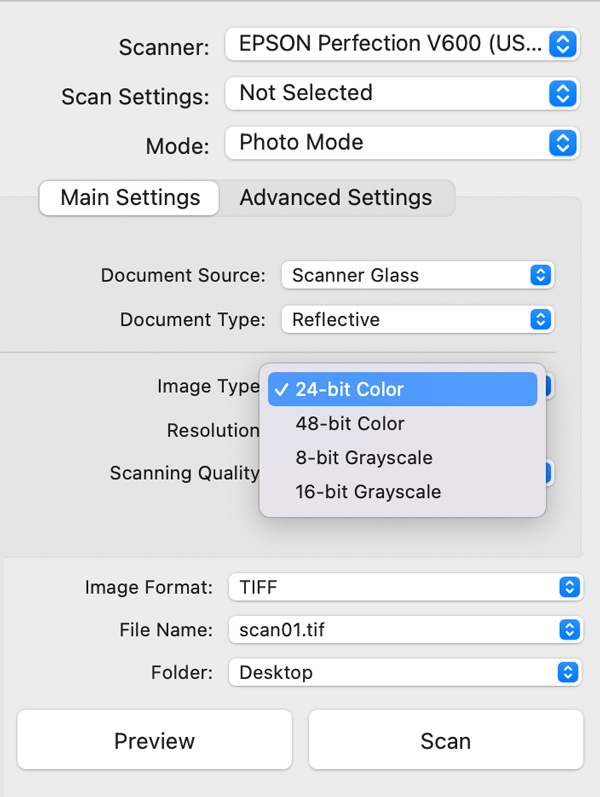
Your scanner software will prompt you to identify what kind of material you’re scanning and kind of file you want to create. Upfront, you need to know that you’re going to scan in colour, even if the photo is black and white. Secondly, your source is a photograph, which is reflective; third, you want the scan to be output to a Tiff file. The labels in your software may be slightly different, so use your best judgement.

Scanning AttributeWhat to Select
Colour Profile:sRGB
Mode:Photo/Photograph
Type:Reflective
Bit Depth:16 bits color/16 bits per channel (Depending on the scanning software, it might also be called “48-bit colour” instead (three channels of 16 bits each = 48 bits).
File Type / Output:Tiff

8. Set the resolution to at least 300dpi 
The scanning resolution determines how large you can print a photo from the file created. A resolution of 300dpi will create a file sufficient to print a photo equal in size to the original photo. For example, if your original print is 5″ x 7″, you want to scan at 300 dpi in order to eventually print a 5″ x 7”. However, to be able to print larger than the original photo, you need to scan at a higher resolution. The chart below indicates the most appropriate dpi settings for printing unto an 8”x10” from variously-sized originals.

Original Photo (inches)DPIMay Print Up To (inches)
2×312008×10
2.5×3.510008×10
3×49008×10
4×46008×8
4×66008×10
5×76008×10 / 8×12
8×103008×10 / 8×12
8×123008×12
11×1430011×14
Note: The dpi settings above have been rounded up to the nearest 100. For dpi that fall outside of those supplied by your scanner’s default options, you can manually enter the value or choose the nearest higher value in the pop-up menu.
The default dpi settings are based on the optical carriage stops of the scanner.

6. Try to avoid corrections while scanning 
Your goal is to preserve as much detail from your photo as possible. While your scanning software provides a lot of control,  it’s best to make only minor adjustments to the photo while during scanning. A slightly flat image is preferred over an over-contrasty one. When in doubt, scan the photo twice, once at each exposure setting you’re deciding between and let the retoucher decide which file to use. Always avoid “sharpening” or “filters.”

9. Rename your files
Once your scans have been made, locate them (often on your desktop), and rename them. Give each file a unique and meaningful name. If you have more than one scan of the same photo, differentiate them with an additional label (i.e. _dark).

Closing

The last piece of advice I can give you is to take your time and stay organized. At first, you may feel overwhelmed trying to do everything “right.” However, you’ll soon be waiting endlessly for the scanner to catch up to you! Stay on top of your scans. Check your work. Label the keepers. Delete extra copies you don’t need. Decide where to store your files on your computer. If you hav cloud storage, you can put a copy of your folder there for safe-keeping. Best of luck!

Leave a Comment

Your email address will not be published. Required fields are marked *

error: